
Rotherham was the ninth station on the Waiau Branch. Using the information from pages 205 to 207 of Les Dew's book, "The Great Northern", we can see that it was a very ordinary station that was operated over a 63 year period - from 1915 to 1978 when the line was closed. When the line was part of the MNL, it was located at 76 miles 2 chains from Christchurch, which was 35 miles 47 chains from Waipara when the line became a branch.
Rotherham these days is a very small locality with just a couple of major streets, one of which is the main road. This was formerly State Highway 70 until 2004 (Google Maps still erroneously shows it as this designation), and is now the Inland Kaikoura road from Culverden to Kaikoura. Rotherham has been known in the last few years as the epicentre of the so-called "Kaikoura" Earthquake of 2016.
This diagram is from Les Dew's book.

This shows a very ordinary type of rural station with limited facilities. The station building however was one of the largest on the line, it has been suggested that Rotherham was going to be the terminus of the line. When the terminus moved to Waiau four years later, it is odd that the station was not moved at the same time. Perhaps it was felt that the Rotherham settlement was large enough to warrant the additional capacity of this station building. It has been a surprise to see two houses on Dew's diagram and the older aerial photos because the station was unstaffed when the railhead moved to Waiau. Again it's a question of why the houses were not moved as well. Probably they ended up being occupied by surfacemen.
The corresponding diagram from NZ Rail Maps (traced from the aerial photos) is as below:

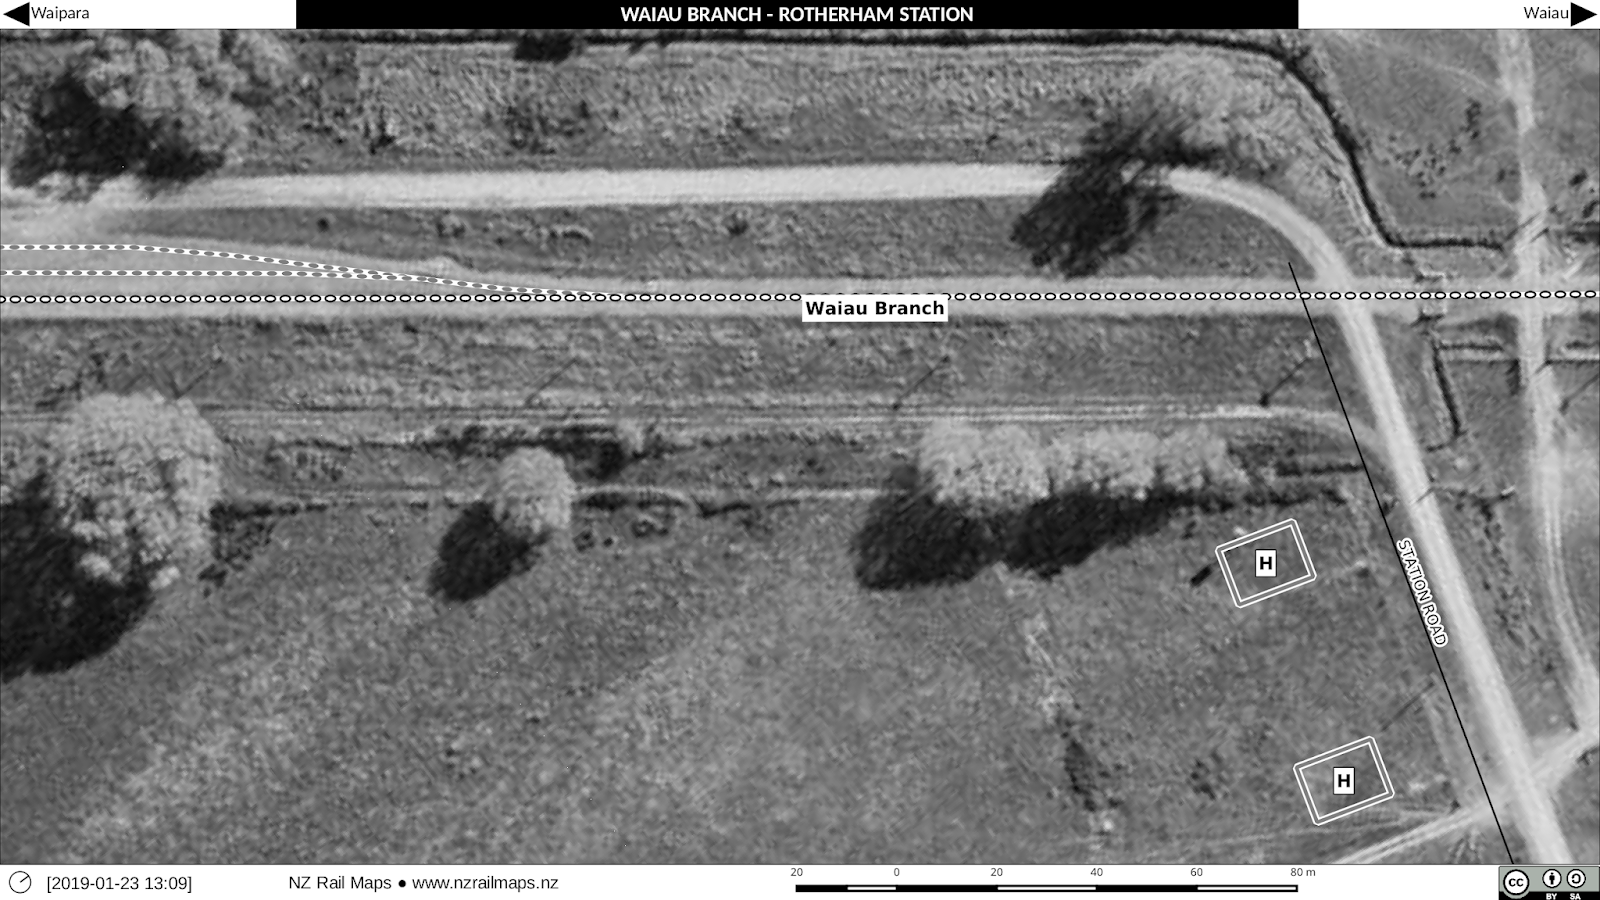
I haven't shown the exact same area, only the detailed area so Hendersons Road is not shown on my diagram (I will show it on the zoomed in versions of the maps posted below).
This map shows the township along with the position of the railway yards.

We now turn to the detailed aerial photo maps of the station yard as follows. Aerial photos used are from 1966, 1975 and 2013. Since the 1975 aerial
photo is by far the best quality of the historical images, what did we
gain from a 1966 aerial? This one did in fact show the stockyards and
the houses, which had all disappeared by 1975. The goods shed was
removed in 1975 but is still visible on the aerial photo taken that
year.
South end of the station yard
This series of maps shows approximately a third of the distance between Station Road and Hendersons Road, at the Hendersons Road end. There is not a lot to see in these maps but we can note that the buildings present on private property along the eastern boundary of the railway do not exist today.


Middle of the station yard
The middle third of the yard area has most of the interesting parts in it.Again we have used 1966, 1975 and 2013 aerials in that order.


The only clearly discernible feature remaining on the ground is one of the loading banks. However, as we haven't visited the site in 28 years, it is possible that the other loading bank or the station platform, both of which were present at that time, still exist.
North end of the station yard
The only real features of interest were the two houses. They evidently were removed sometime between the 1966 and 1975 aerial photos. (Again the aerials used are respectively 1966, 1975 and 2013).


Photos of the yard
This photo is from Dew's book (with original credit).

It shows the station building, the goods shed with a wagon under the veranda, and a stack of sleepers. Note the general condition of the yard and track. The goods shed was itself rectangular, but appears more square in the maps because of the veranda.

Here's the other photo from the same book, and showing one of the loading banks as well. Stockyards are visible as this was taken in 1968.

The station building taken in June 1986 - eight years after the line closed and well after the track was lifted. This was part of a trip we undertook looking at all extant remains of the branch line at that time. Note the sign board still present.

This June 1986 view of the station platform looking in the direction of Achray makes an interesting comparison with previous photos from when the line was open.

From north of the station, a concrete bridge being reused by a farm access road. The station building can just be seen in the distance.

It has been suggested this sledge was used to help lift the track. Similar devices have been used around the country for purposes like these for separating rails and sleepers that were held in places by dogspikes. Some track would have been held by screwspikes which would have to be manually unscrewed before towing a device such as this along the track bed. A bulldozer or some other type of road based machine would have been required to pull the sledge. This is how the Otago Central line was lifted, except that they towed theirs with a locomotive. It works by having the loose ends of the rails fed over the back of the device, creating the necessary leverage to rip the rails and sleepers apart.

The original loading bank (with a wooden edge) is seen in this June 1986 view. It was very short and made loading flatdeck wagons difficult.

On the right in this view looking down the yard from the north end, is Rotherham's version of a high level loading bank (as so described in the text). This was around 17 metres long and about 1.1 metres high built in 1968. The more typical structure called a "high level loading bank" around the country is about two metres high and usually is constructed of vertical railway irons driven into the ground and faced with old sleepers. We know that one of this type did exist at Culverden and possibly the ones built at Waikari, Balmoral and Waiau were the standard pattern as well. When the Waiau one was completed in the late 1960s it was cited that the one at Rotherham was unsuitable - because in reality it was a low level bank designed to load flatdeck wagons, and perhaps the original was lower than usual for these types of wagons. The main type of wagon loaded at the usual type of high level bank would be highsiders (L type) which were loaded over the top of their sides rather than through their side doors. This was essential when handling raw materials such as lime or coal, as in these situations the doors were only suitable for unloading.

Looking north along the formation from the Station Road level crossing site. The building on the right is a farm building that can be seen in one of the previous photos.

This view of the station building was taken in August 1990. It had by then been purchased by Weka Pass Railway and was to have been shifted to Waikari to be used for their passenger terminus. However because of deterioration of the building evident in this view these plans were abandoned in favour of the present building there which came from Hundalee. The Rotherham station building was sold for removal in 1993 so it is not present at the site today.